How Flare works in 90 seconds.
Open a demo. Hover any heading. Click it. That's the editor. There is no admin sidebar, no schema, no build step. Everything below is just doing that more often — with a few keyboard shortcuts and an AI peer alongside.
Demos sign you in with any Google account · Drafts auto-revert every 15 minutes so you can break things freely.
Take your time.
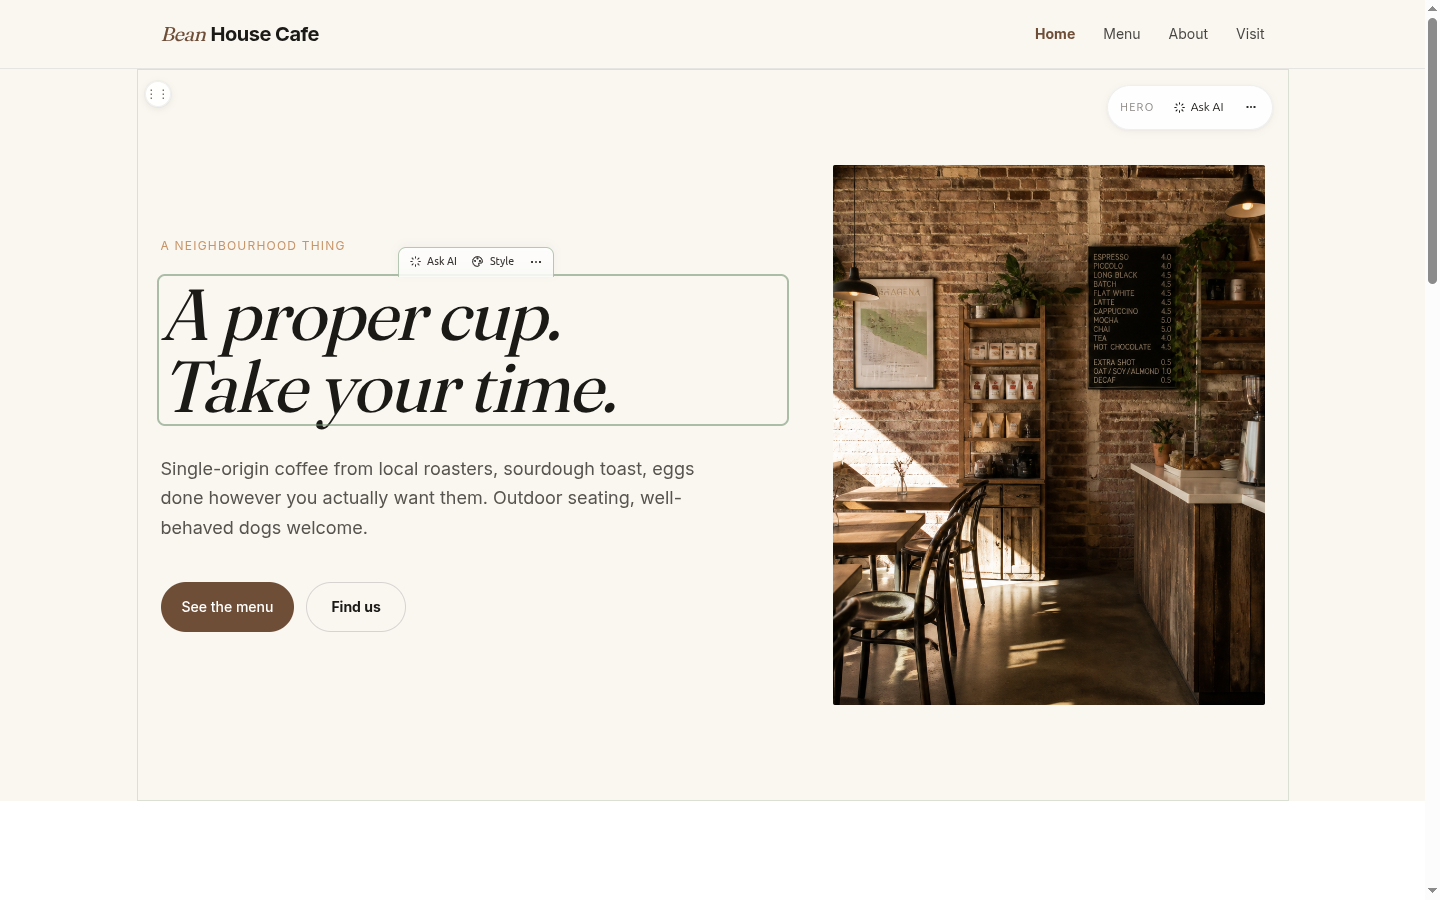
Nine live sites — pick one, click anything, edit it.
Real sites built on Flare. Every one opens straight into edit mode. The AI uses the same models that ship in production. Break things freely; the cron resets drafts every 15 minutes.
Click anything. Change it. Move on.
95% of editing is text, images and links. Flare reduces all of it to the same gesture: hover, click, type, save. The chrome that helps you is only there when you summon it.
1. Hover anything → a pill appears
Move your mouse over a heading, paragraph, image, or link. A small floating pill snaps above it with the right verbs for that element. Move the mouse away, and the pill disappears.
- Text:
✨ Ask AI,🎨 Style,⋯(edit text, rewrite tones, edit link) - Image:
↑ Replace,✨ AI generate,✎ Alt text - Link:
✎ Text + URL
2. Click to edit text inline
Click a heading. Type. ⌘S saves, Esc cancels. Select a span first to get an AI rewrite popover with three tone options.

- Editor + viewer roles get plain text — no accidental markup damage
- Designer + admin get rich formatting: ⌘B bold, ⌘I italic, ⌘L link
- Selecting text inside an edit opens the AI rewrite popover automatically
3. Replace any image, by drop or by prompt
Click an image. A popover slides in next to it. Drop a file from your desktop, paste a URL, ask the AI for one — all three routes land in the same R2-backed media library.
- Drag a JPG/PNG/WEBP straight onto the image to replace it without opening the picker
- AI generation uses Cloudflare Workers AI — no extra account, no separate billing
- Alt text lives on its own ✎ button so non-sighted users get a real description
When the change is bigger than a sentence.
Sections are the unit of restructure. Add one, duplicate one, move one — without touching HTML, and without a "blocks" abstraction that traps you later. Underneath it is still your HTML.
4. Section ribbons
Each section has a small ribbon in its top-right corner: the section's name, ✨ Ask AI, and a ⋯ menu for structural changes.
- ↑ Move up / ↓ Move down — reorder without HTML edits
- ⎘ Duplicate — clone as the next sibling
- </> Edit HTML — designer/admin only, raw HTML modal
- ▤ Convert columns — flex/grid restructure with live preview
- ✕ Delete section — undoable through history
5. Add a section from the slash menu
Hover between two sections. A thin spacer reveals a + Add section button. Click it for six presets — or describe what you want and let the AI generate something custom.
- Presets: Hero · Services grid · Testimonials · FAQ · Team · Pricing
- Or type "3-column gallery with captions" and the AI builds one matching your brand
An agent on the page, not in a sidebar.
Every Flare site has its own AI peer with the brand voice loaded. It can read pages, draft edits, swap images and answer questions — through chat, voice, command palette, or email.
6. Chat dock ⌘J
A dock slides in from the right. Talk like you'd talk to a junior designer. The agent reads pages, edits sections, generates content, then drops "EDITS APPLIED TO DRAFTS — Approve / Discard" inline.
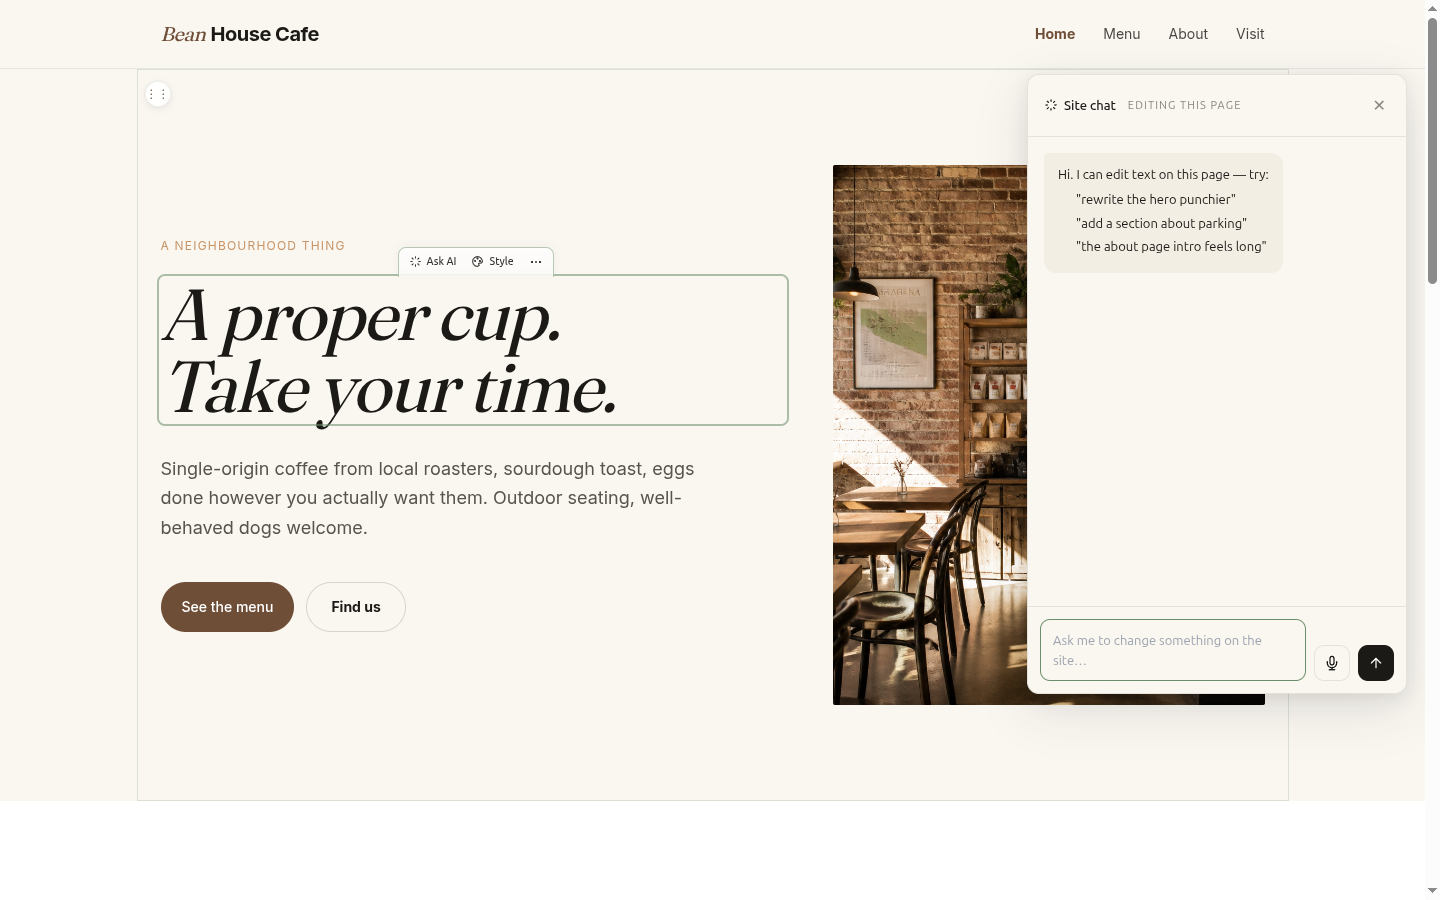
Things it handles well:
- "Rewrite the hero punchier — under twelve words."
- "Add a parking section with our hours from the about page."
- "Add an FAQ page with these questions: …"
- "Bump the heading 50% bigger and add 60px of padding above it."
EDITS APPLIED TO DRAFTS with Approve and Discard buttons in the chat thread.7. Command palette ⌘K
Open the palette from anywhere. Jump to a page, run a command, ask the AI.
- Save draft · Publish · Open version history · Toggle preview mode
- Jump to any page · Open the brand kit · Back to workspace
- Type anything and it falls through to "Ask the AI" by default
8. Voice — hold the mic FAB
A small 🎙 floating action button sits bottom-right when the chat is closed. Hold to talk, release to send. Transcription feeds straight into chat — same brand voice, same draft flow.
9. Email is also the editor
Clients don't need an account or a CMS visit. They email {site-slug}@flarecms.au with a request. The agent reads it, drafts the change, replies with a one-click approve link. Reply to refine; threading is preserved.
Different chrome for different roles.
The role chip top-right of the floating chrome decides what tools you see. Editors get a simpler page; designers get the controls that go past content.
| Role | Can do |
|---|---|
| Admin | Everything — content, structure, design, members, brand, billing. |
| Designer | Content + structure + the 🎨 Style panel + raw HTML mode. |
| Editor | Content only. Plain-text edits, image swaps, link text/URLs. No 🎨 Style button. |
| Viewer | Read and preview. Cannot save. |
10. Style panel Designer / Admin
Click 🎨 Style on any hover pill. A side panel slides in with four tabs. Brand tokens show up as chips next to colour and spacing controls so you stay on brand.
| Tab | Controls |
|---|---|
| Spacing | padding / margin / gap — T R B L, px/rem/% |
| Text | size · weight · line height · letter spacing · align · colour · transform |
| Effects | background · border · radius · opacity · shadow presets |
| Layout | display · flex direction · justify / align · max-width · min-height |
11. Brand kit Designer / Admin
Per-space brand definition: primary and accent colours, fonts, and voice rules. Every AI edit honours them; every Style control offers the tokens as chips.
- Voice rules are honoured by every AI edit (EN-AU spelling, no em dashes, sentence case, etc.)
- Colour tokens appear as one-click chips next to every colour input
- A weekly tone audit emails a digest if any page drifts from the voice rules
12. Raw HTML mode Designer / Admin
A section's ⋯ menu opens a raw HTML modal when you really do need to drop into HTML. Save validates the edit and only writes the section, never the whole page.
From edit to live to a client's inbox.
The four moves an agency does over and over — save, publish, restore, hand over — are all one keystroke or one click. New sites take 30 seconds.
13. Save and publish
⌘S saves. ⌘⇧S saves with a "what changed?" message that becomes a real changelog entry, not a timestamp.
- Immediate mode: saves go straight to live (no separate publish step)
- Draft mode: saves land in
_flare/drafts/; Publish promotes to live - Auto-save fires 3 seconds after the last change so nothing is lost
14. History + restore
Every save creates a version. The history panel (palette → Version history) lets you click Restore on any past version. Restoring creates a new save — your current draft becomes an older version, not destroyed.
- Up to 50 versions per page (configurable)
- Relative-time labels: "5 minutes ago", "yesterday", "3 days ago"
- Save-with-message turns history into a readable changelog
15. Hand over a site to a client
In the workspace, click ✉ Hand over on a site card. Fill in the client's name, email, and an optional "first edit" suggestion. They get a magic link.
- HMAC-signed token · 14-day expiry · domain-bound
- One click in the email lands them in edit mode — no Google login required
- Personalised coachmark ("Hi Sarah, …") with a halo on the first editable element
- Most first edits happen within 60 seconds — no training needed
16. New site in 30 seconds
In the workspace → Fleet tab → + New site. Fill the modal. The R2 bucket, HTML upload, Worker deploy and domain attachment all happen via the Cloudflare API — zero terminal.
- Default to
<slug>.flarepages.auor paste a custom domain - Use the starter template, or paste your own HTML body
- Live before you finish reading this paragraph
Keyboard reference
That's the editor.
Hover, click, type. Drop in an AI peer when you want one. Hand the link to a client and move on.